PiServer
My instrumental Raspberry Pi Project

Firstly, I must say I love taking photos and I also happen to be an Apple fan (please don’t hate). Do you happen to see where this is going? I am also a 3rd year student studying Electrical & Electronics Engineering, this might help you understand my level of expertise or lack there of if you happen to be an enthusiast or professional.
So you’re running out of space on your internal storage, you’re also running out of space on your many hard drives. You very much consider all the data you have to be very important regardless of if they really are. You’re holding on to them for safe keeping or in the event that you might need that one file or image someday…someday.
I very much understand, I was faced with a similar dilemma. Dare I say, the exact situation you’ve just described.
I had to do something, and just when the COVID-19 quarantine lockdown dawned, I thought, now is the time. Thankfully, amazon delivery services were still running.
This is a slightly more comprehensive documentation on Piserver as posted on the subreddit r/homelab
This write up is split into three segments; design, electrics/electronics and software.
Here’s the rundown:
Design
The idea of this project was to create an accessible large storage device for personal use. The proposed intended use of this medium was to store an archive of raw/jpeg photos, games and to act as a Time Machine backup server. The result of the project has exceeded expectations and has more intended uses that would be discussed further on.
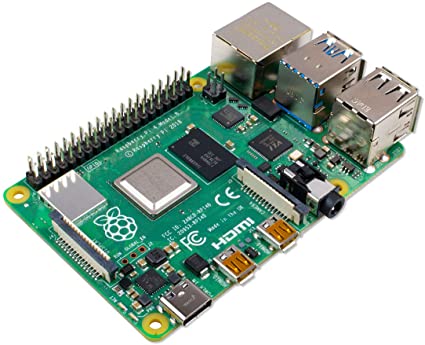
As at the time of searching, there were two big name brands that dominated the search results for Network Attached Storage (NAS), Synology and QNAP. They both have various tiers of solutions they offer at various price point. My budget would only suffice for picking up a low end NAS and I wasn’t pleased with what I saw. At this point I remembered I own a Raspberry Pi 4 from an earlier attempt at a project and thus the PiServer idea was born.
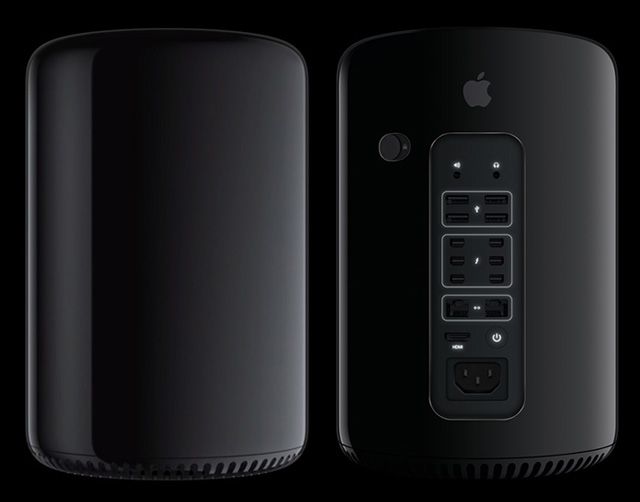
Inspiration for the design of PiServer enclosure came from Apple’s 2013 Mac Pro, nicknamed the trashcan, an elegant and simple design free from visual obstructions.
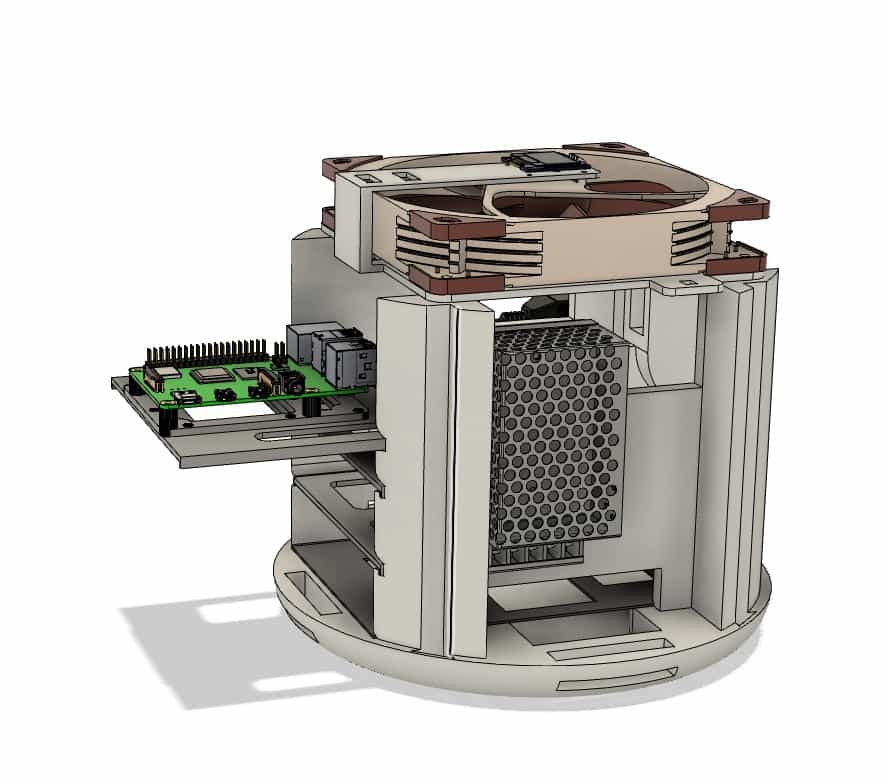
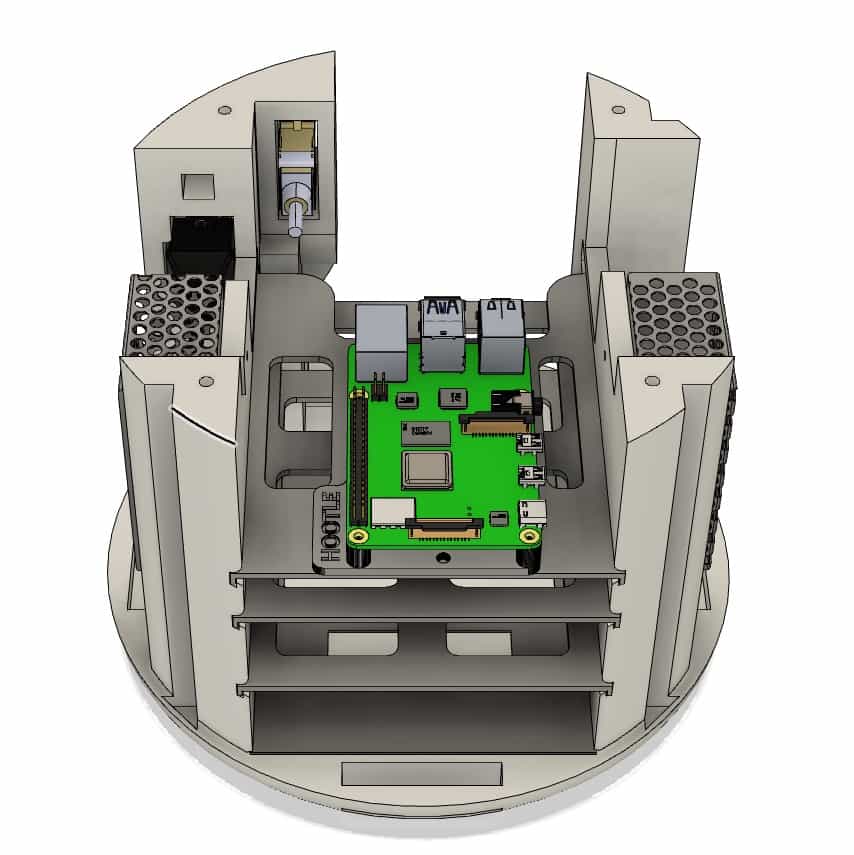
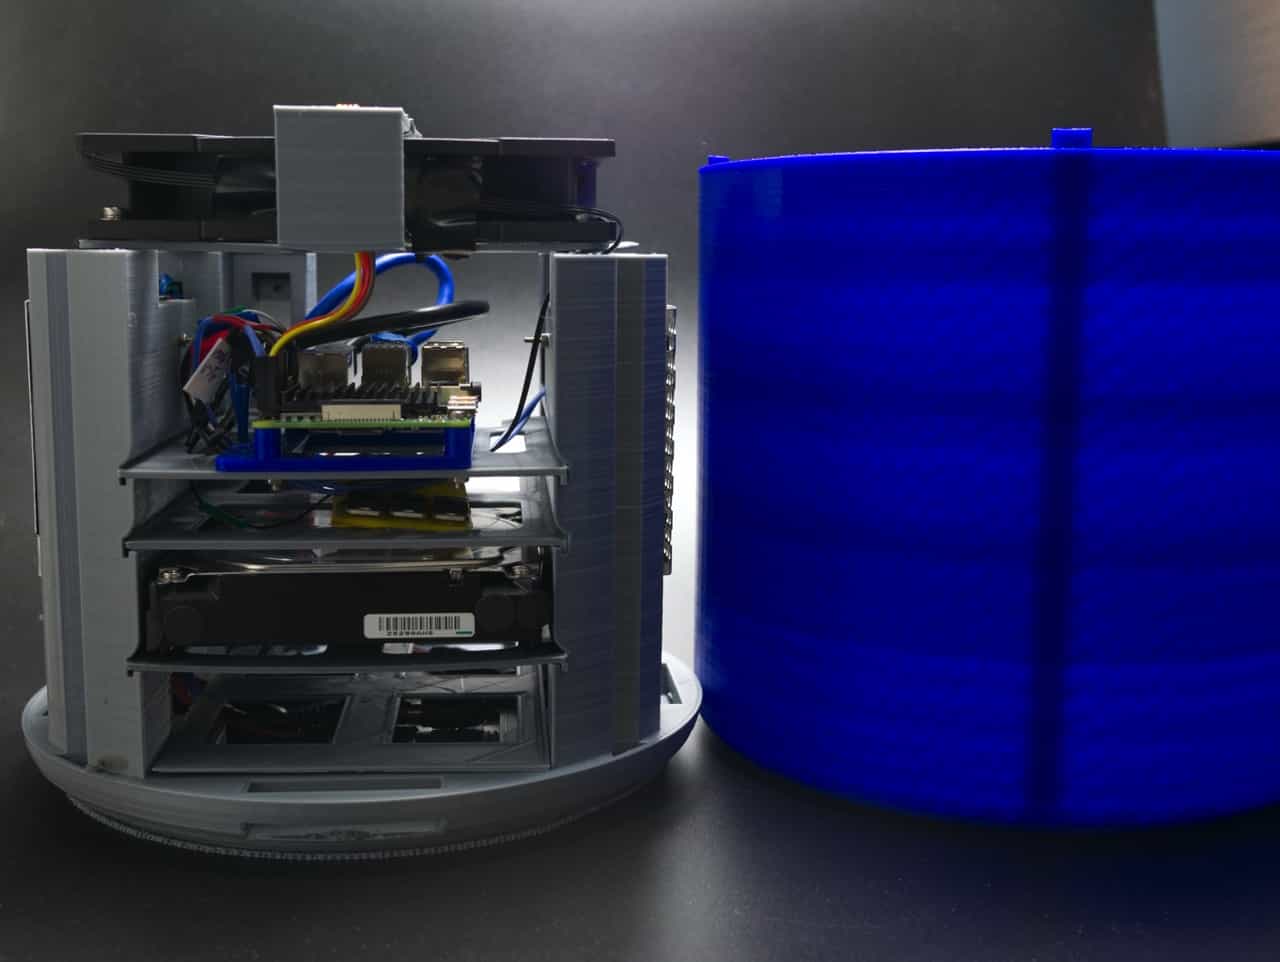
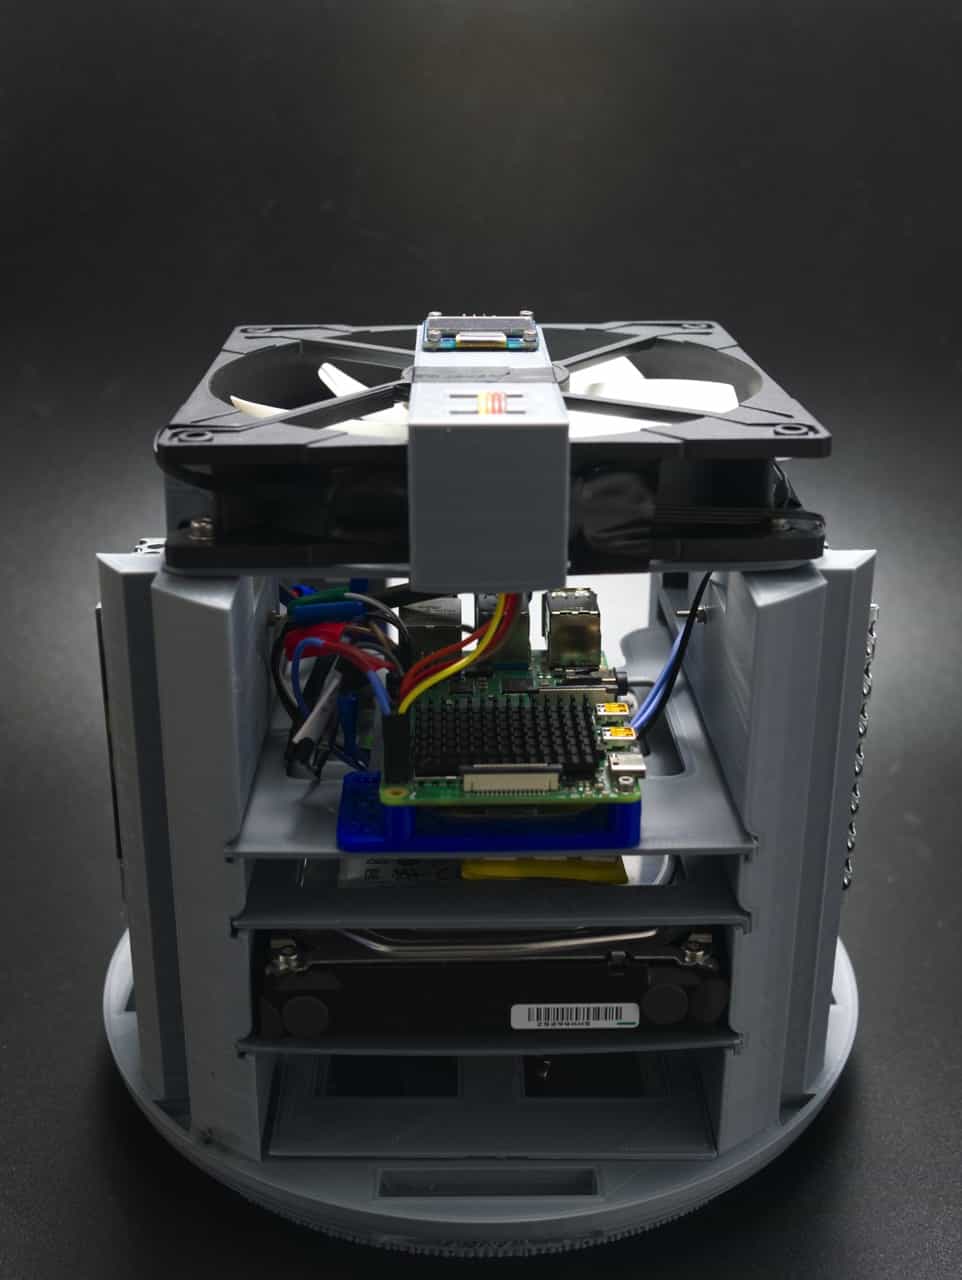
The PiServer is designed to hold a 3.5 inch HDD in a confined space while maintaining the cylindrical shape. This brought about its challenges when planning for tolerances and other devices that would need to be fitted inside the case; I took dimensions of parts that seemed appropriate off the internet and started jotting them down.
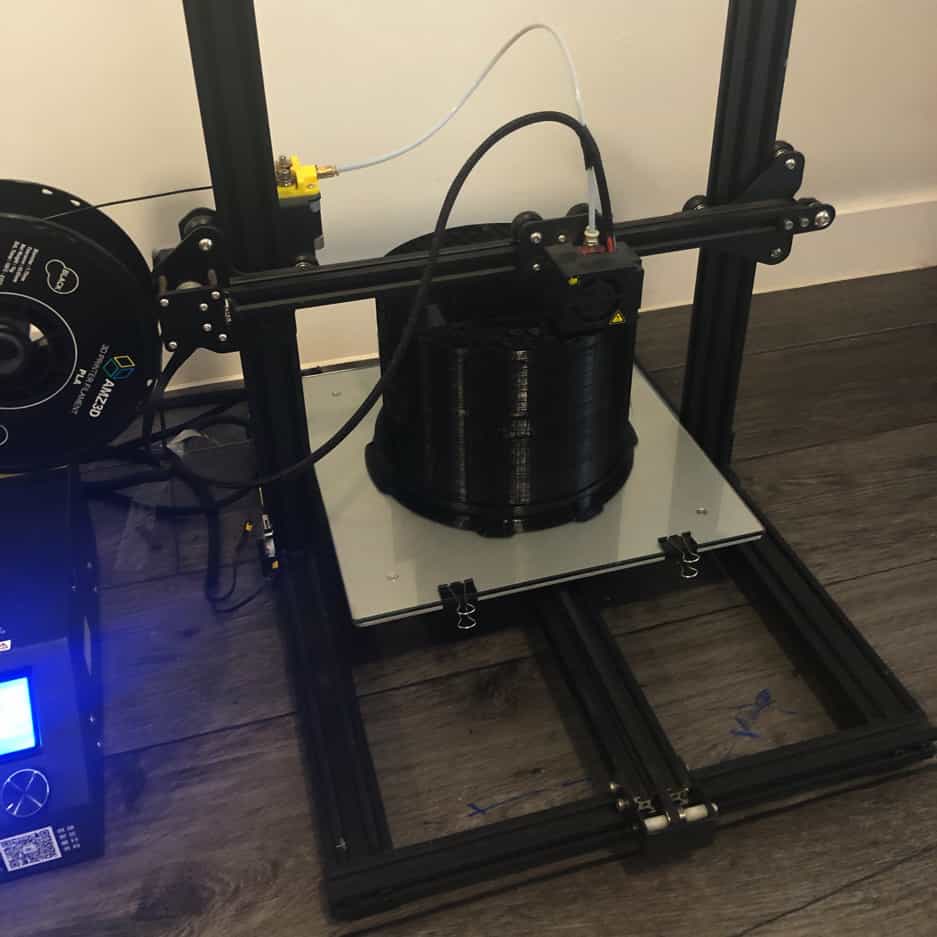
The PiServer enclosure is made from PLA, a 3D printable material and weighs a few grams under 1kg with its enclosing case fitted. With this in mind, it had to be carefully designed to reduce costs from printing prototypes. As with many things it wasn’t perfect and two prototypes were created which exposed a major flaw in the design in relation to how a 3D printer is able to create a model.
The initial design had overhangs that spanned across the middle of the enclosure. To print such large overhangs, a 3D printer would need to print support structures to hold the platforms in place while creating them. The support structures proved too difficult to remove and resulted in the first failed prototype that completed with no printing errors. This prototype also took 3 days to print.
The second prototype reduced the PLA mass significantly and got rid of some unnecessary overhangs as well as improving my knowledge on 3D printing models. This prototype was not able to finish due to a printer error. The same error also happened a second time.
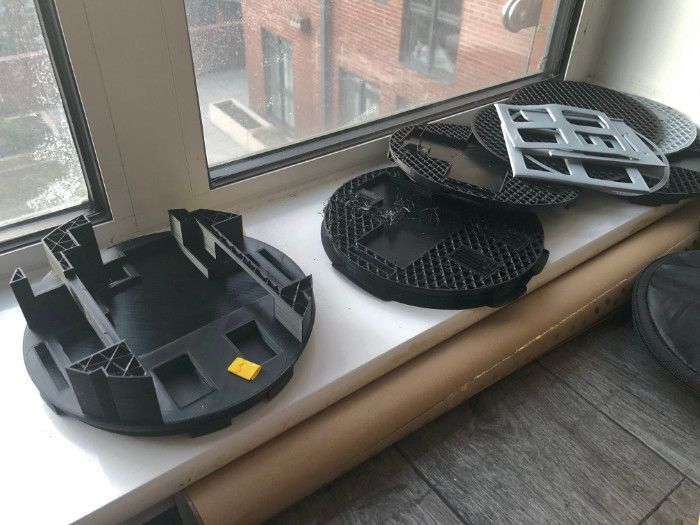
It’s starting to get grim, the prototypes use a lot of PLA, it takes a lot of time to print and its beginning to get expensive.
At this point, it is evident that the PiServer needs a significant re-design.
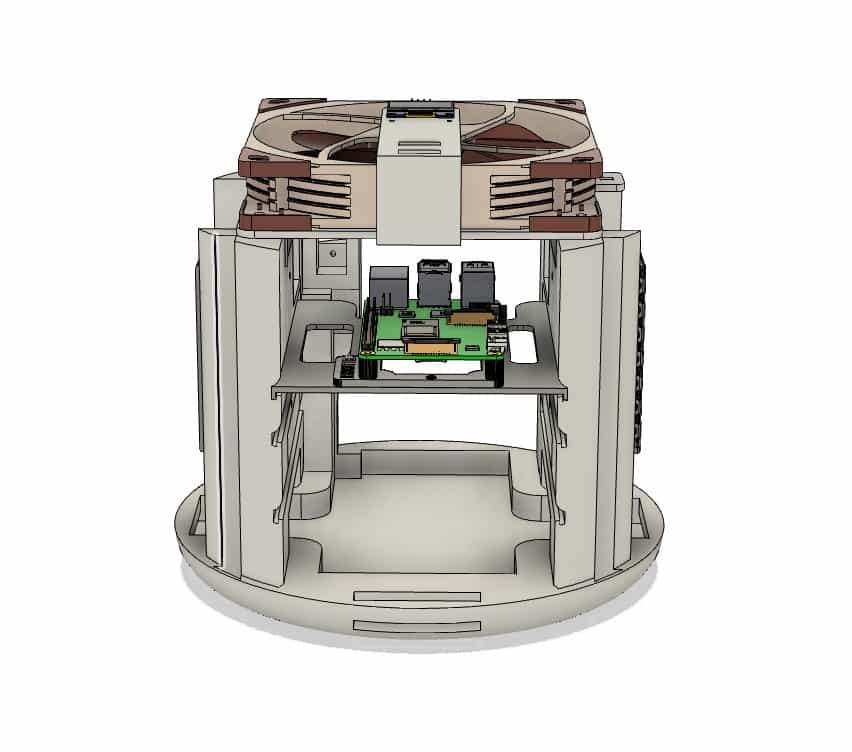
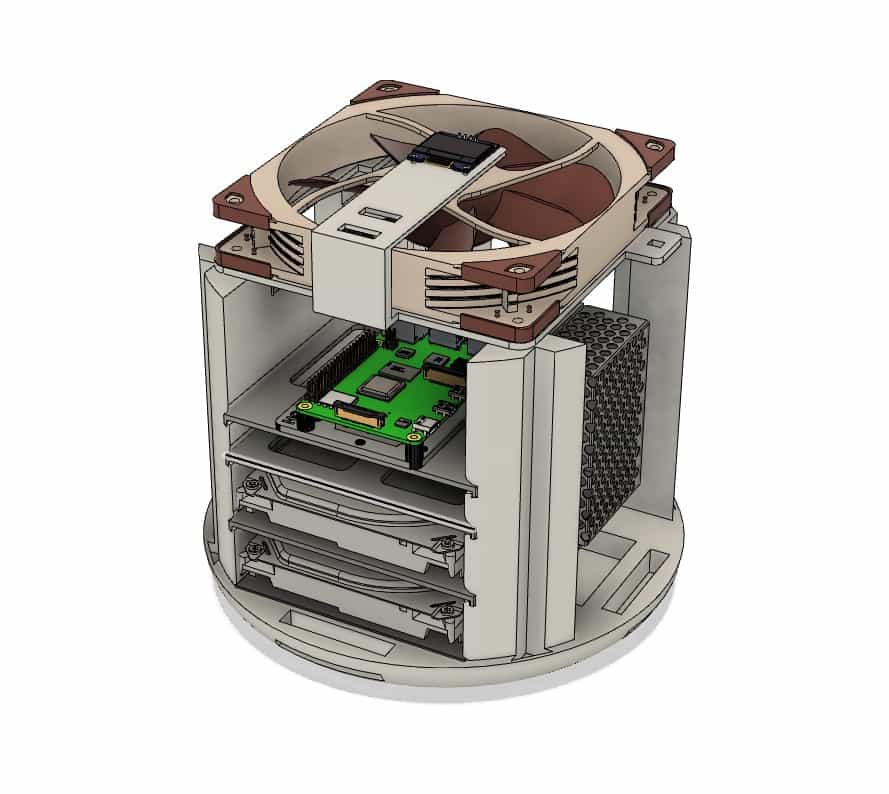
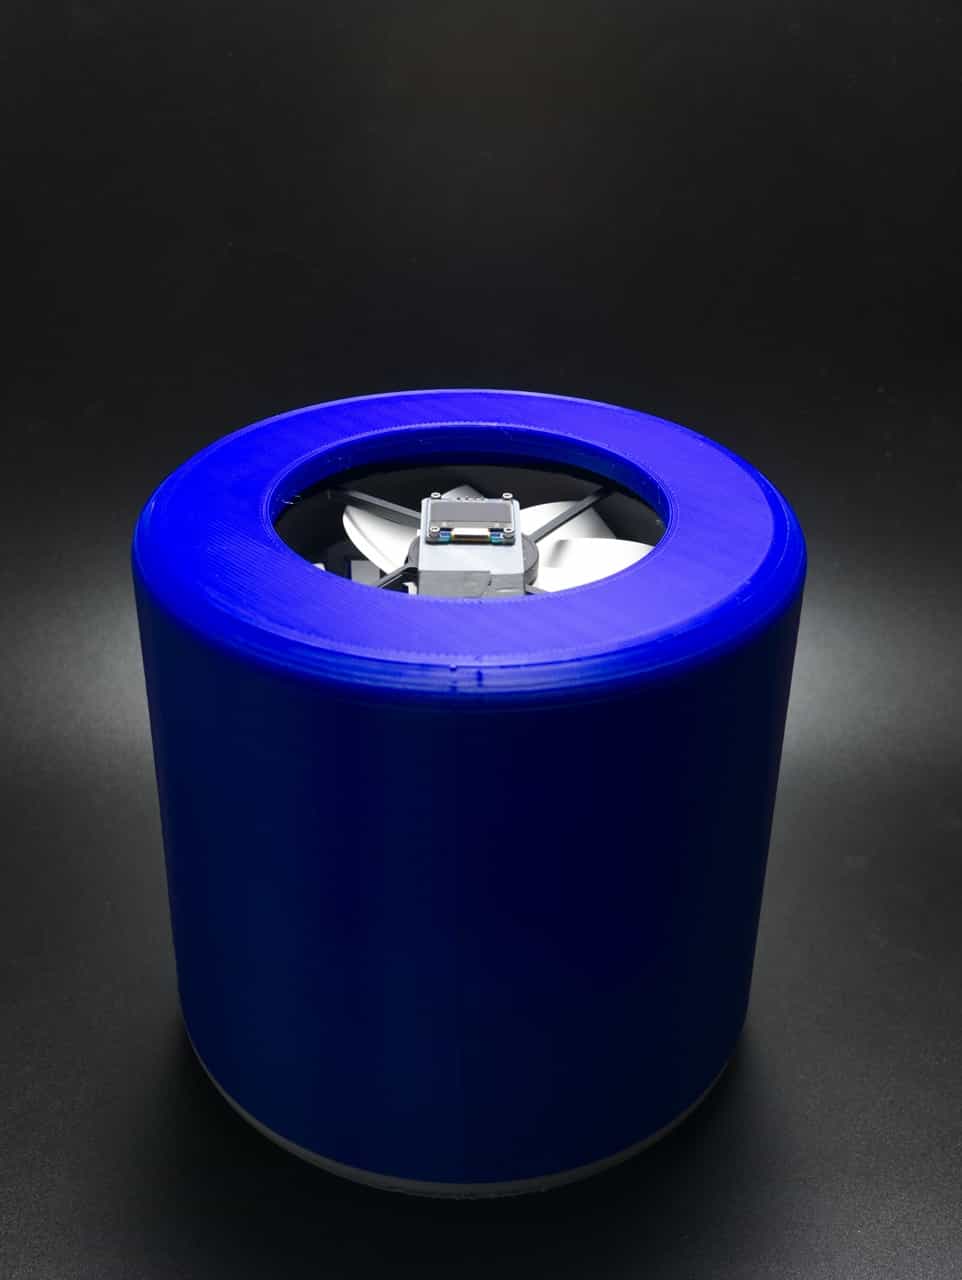
Introducing, PiServer 1.0 with a beautifully crafted rail system that allows for modularity while keeping a compact and efficient form factor. It comes in a two tone colour, eloquent grey & dashing blue or any PLA material you can get your hands on.
Check out the PiServer Media Gallery for more photos & videos.
.STL files are also available for download below.
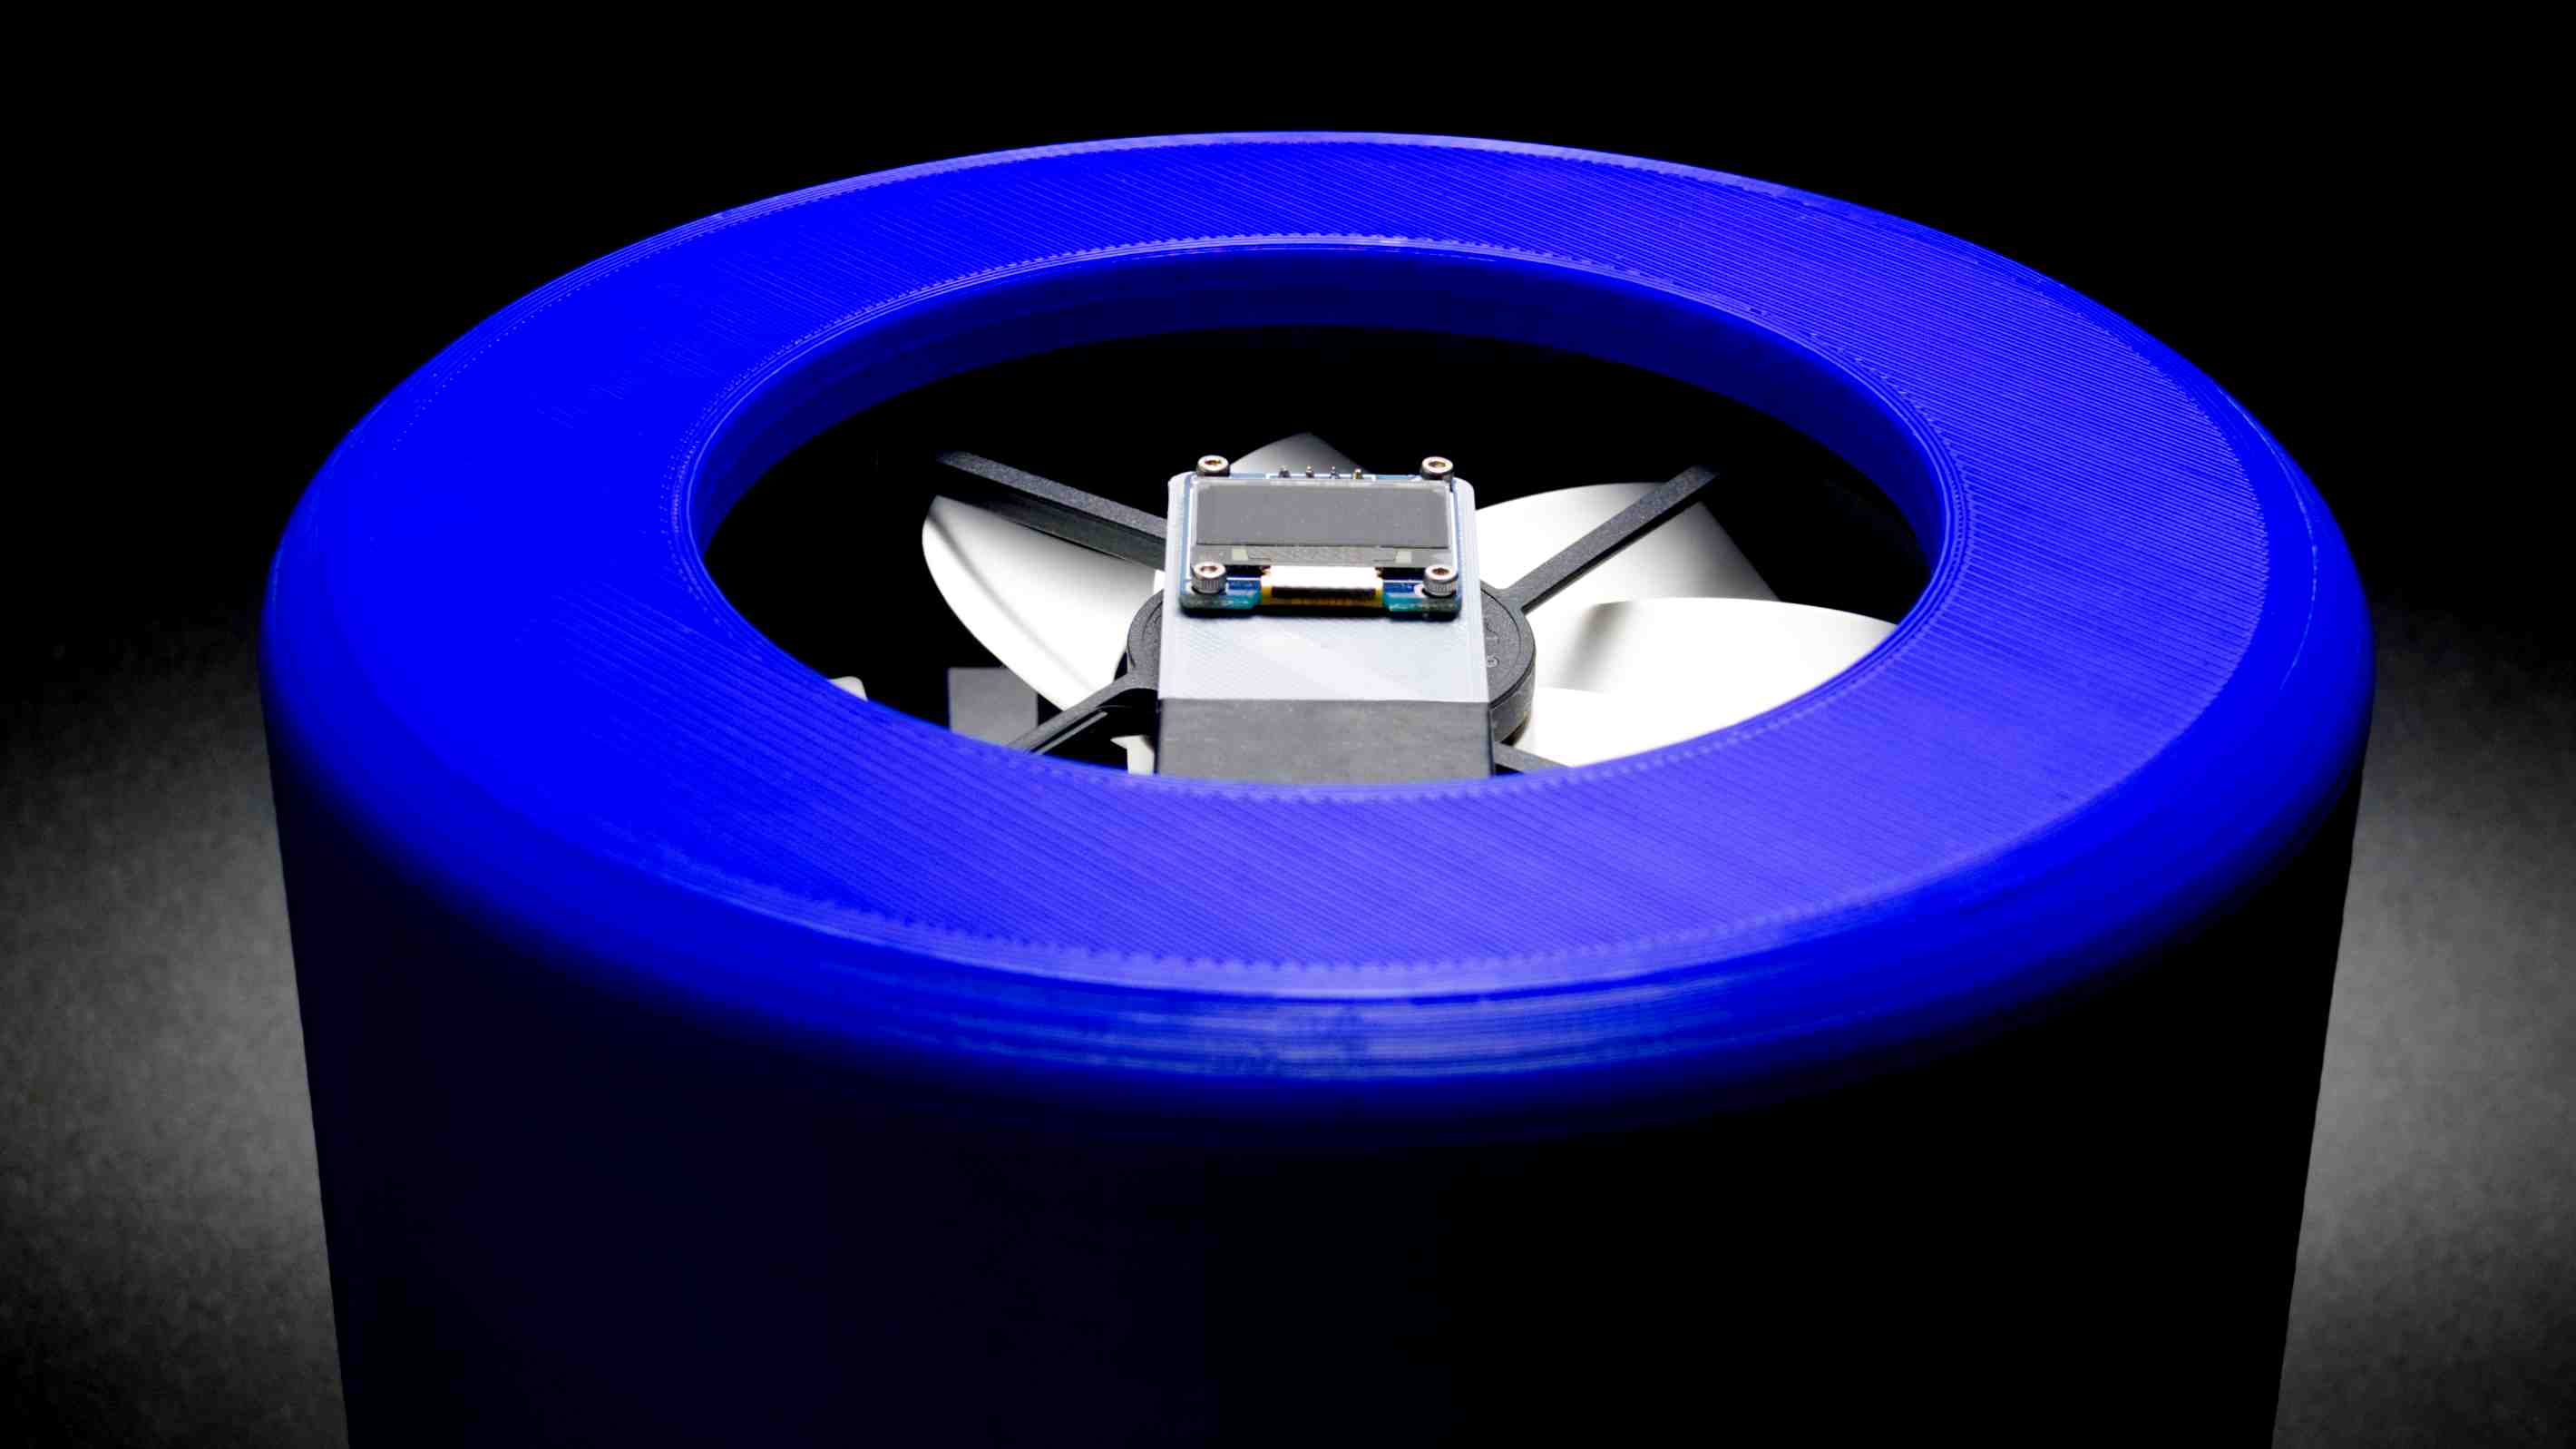
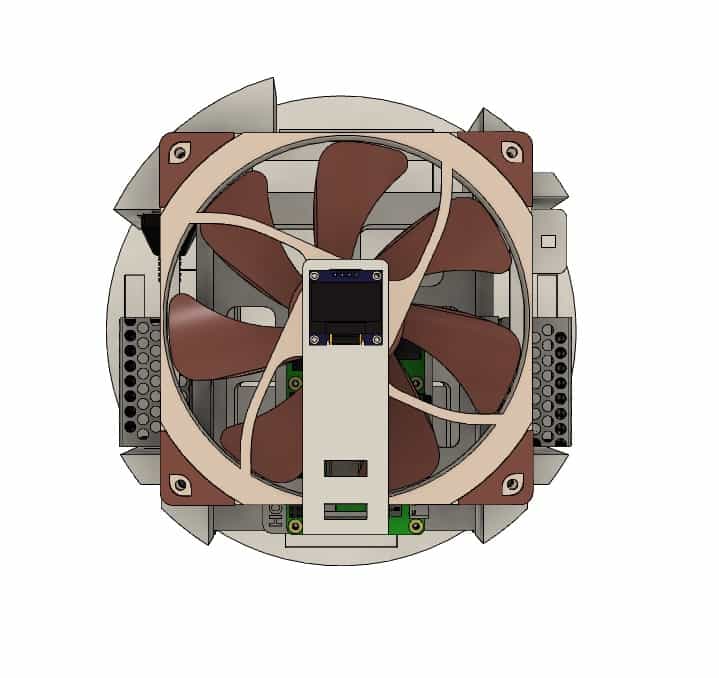
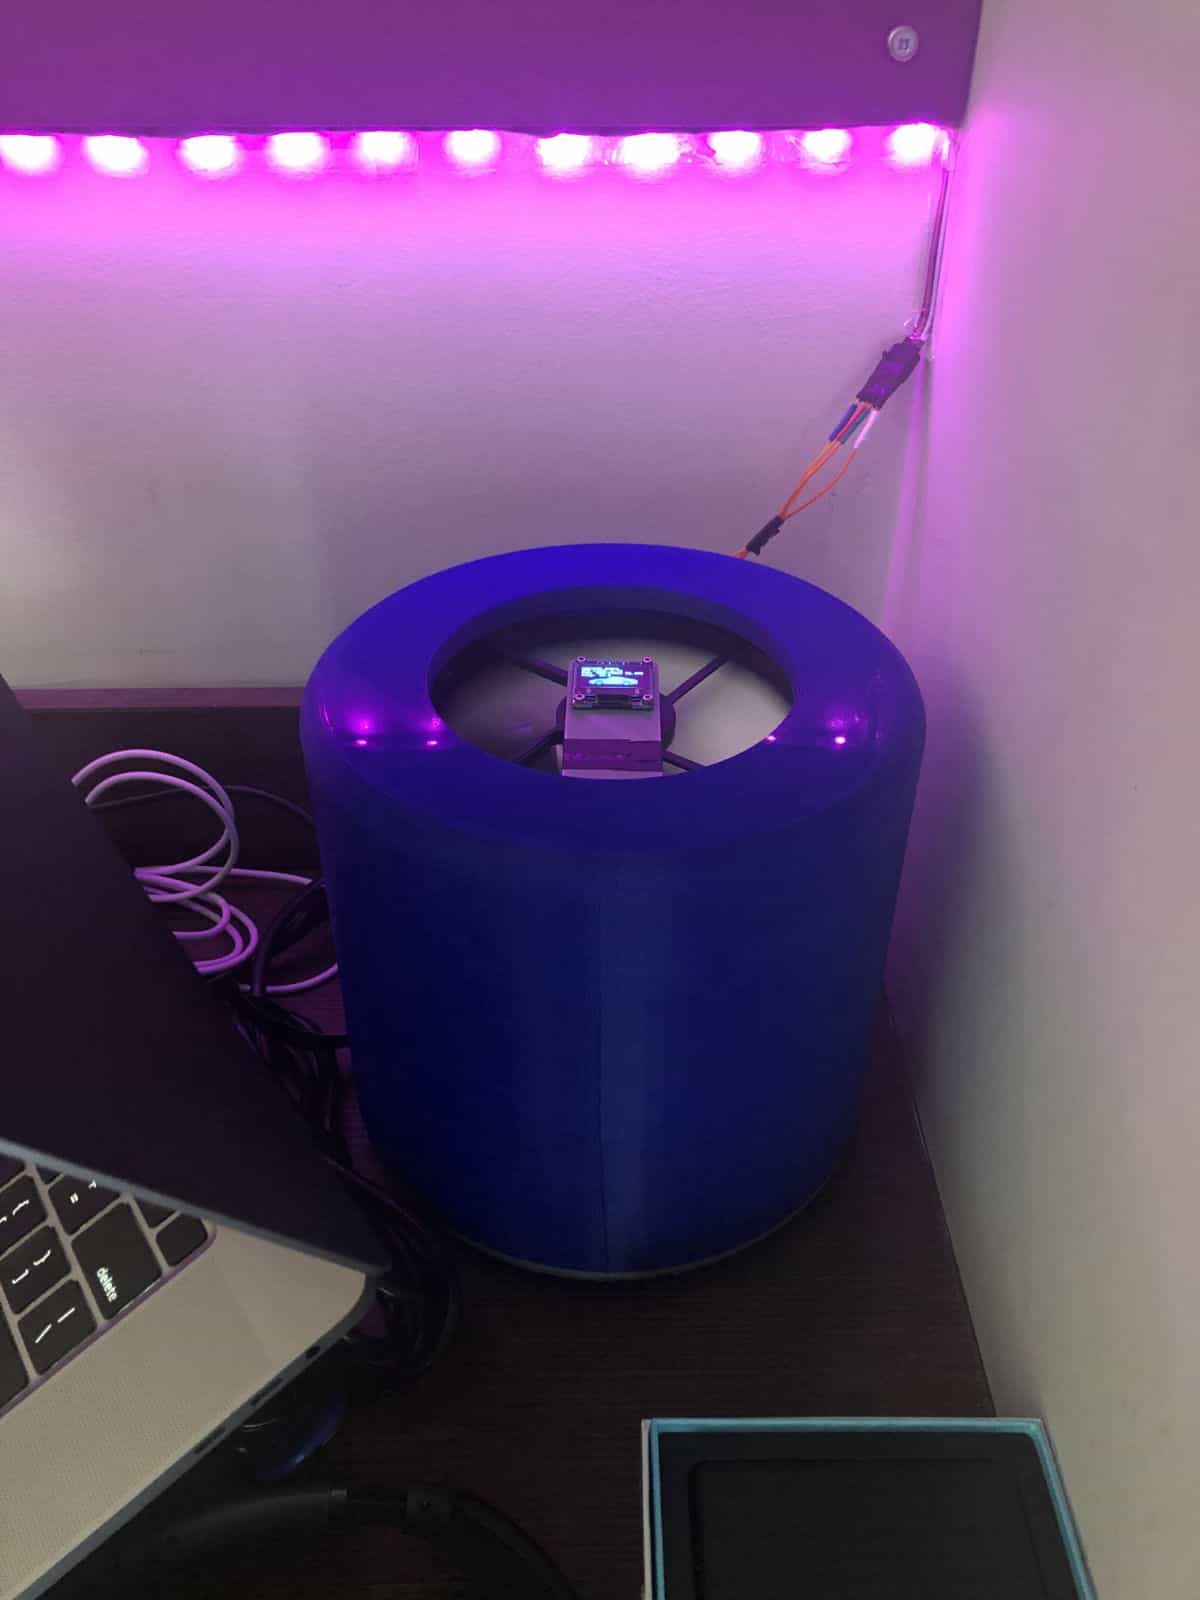
PiServer 1.0 addresses nearly all the issues with the alpha builds, including platforms to place hard drives and the Raspberry Pi. It also offers more space to organise and route cables. A fan brace has also been included to accommodate a mini OLED display intended to serve as information display.
Airflow in PiServer 1.0 was critically considered to ensure optimum performance. This is evident in the base of the of the main enclosure (vents on the sides), the rectangular holes in the rack platforms, and the fan sitting atop it all to facilitate air movement.
Electrics/Electronics
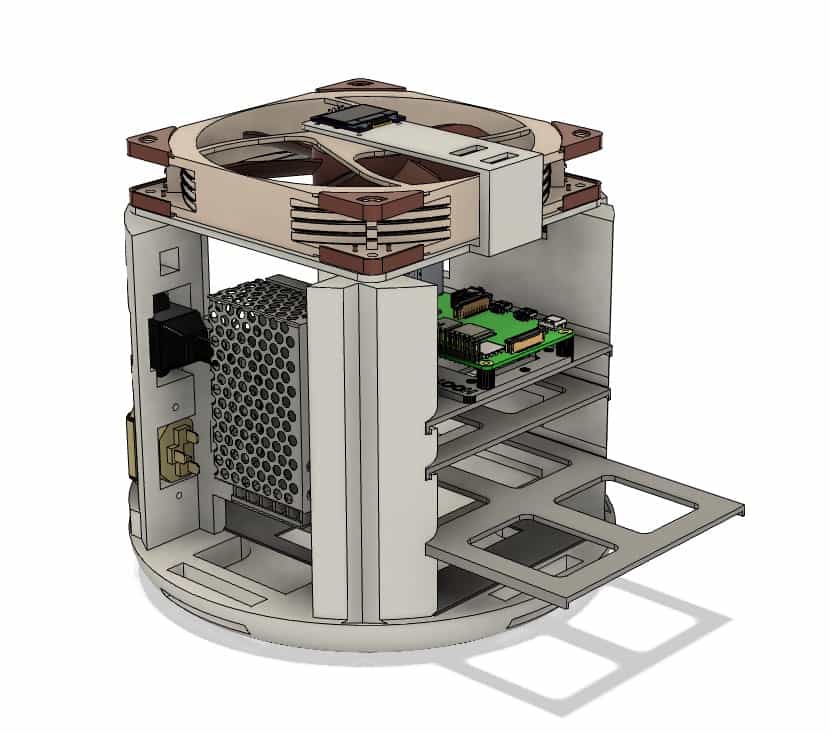
To power PiServer, I opted to use off-the-shelf power supplies to reduce risks as I would be using AC power. There are two PSUs, a 25.2W 12V and a 25W 5V MeanWell supply; These were carefully selected to meet the space restrictions and power requirements of the devices in PiServer. The 12V supply powers the drives and the top-mounted fan while the 5V supply powers the Pi and some add on accessories. To polish the look of PiServer, an IEC connector and an ethernet adapter is used to provide detachable connections on the outside of the PiServer enclosure. The idea to power LED lights from PiServer came as an afterthought. 3 MOSFETs were soldered to a breadboard (wrapped with yellow electrical tape) with its supply connected to the 5V supply and the gate controlled by the Raspberry Pi’s GPIO pins using PWM.
Software
The software side of things has been the most interesting part of this project and it is an ongoing process. Working on PiServer exposed me to the world of Linux, Web Servers and Networking. I’ve become familiar with using the terminal, the linux file structure, linux permissions, Python, Docker, ssh-keys, Flask (Python), Node.js and more.
The main function of the Raspberry Pi, running as a NAS is managed by an open source software, OpenMediaVault 5 (OMV 5). Soon after I discovered what Docker was, and I went ahead to pull and run a Plex container. I realised there was a need to pay for a pass to stream content so I soon killed the container and went with an open source alternative, Jellyfin. This becomes a regular occurrence with this project and I’m very grateful for open source software. Jellyfin is a media server that serves media content hosted on PiServer over a local network. It’s a nice feeling being able to pick up a mobile device and continue watching the content I was watching at my desk.
There is a docker container for OpenVPN & Deluge, a Syncthing container and a PiHole Container. Syncthing is a great tool to sync folders across different computers and is currently set up on PiServer to sync files on an external ssd (my working drive) connected to my laptop, to a backup folder on PiServer. This has quickly become one of the most useful software on PiServer to take away the factor of having to manually copy my files over. The PiHole container is another useful tool for blocking advertisements and internet trackers on all devices in my local network by acting as a Domain Name Server (DNS).
PiServer is also a TimeMachine Backup Server for making full backups of my laptop.
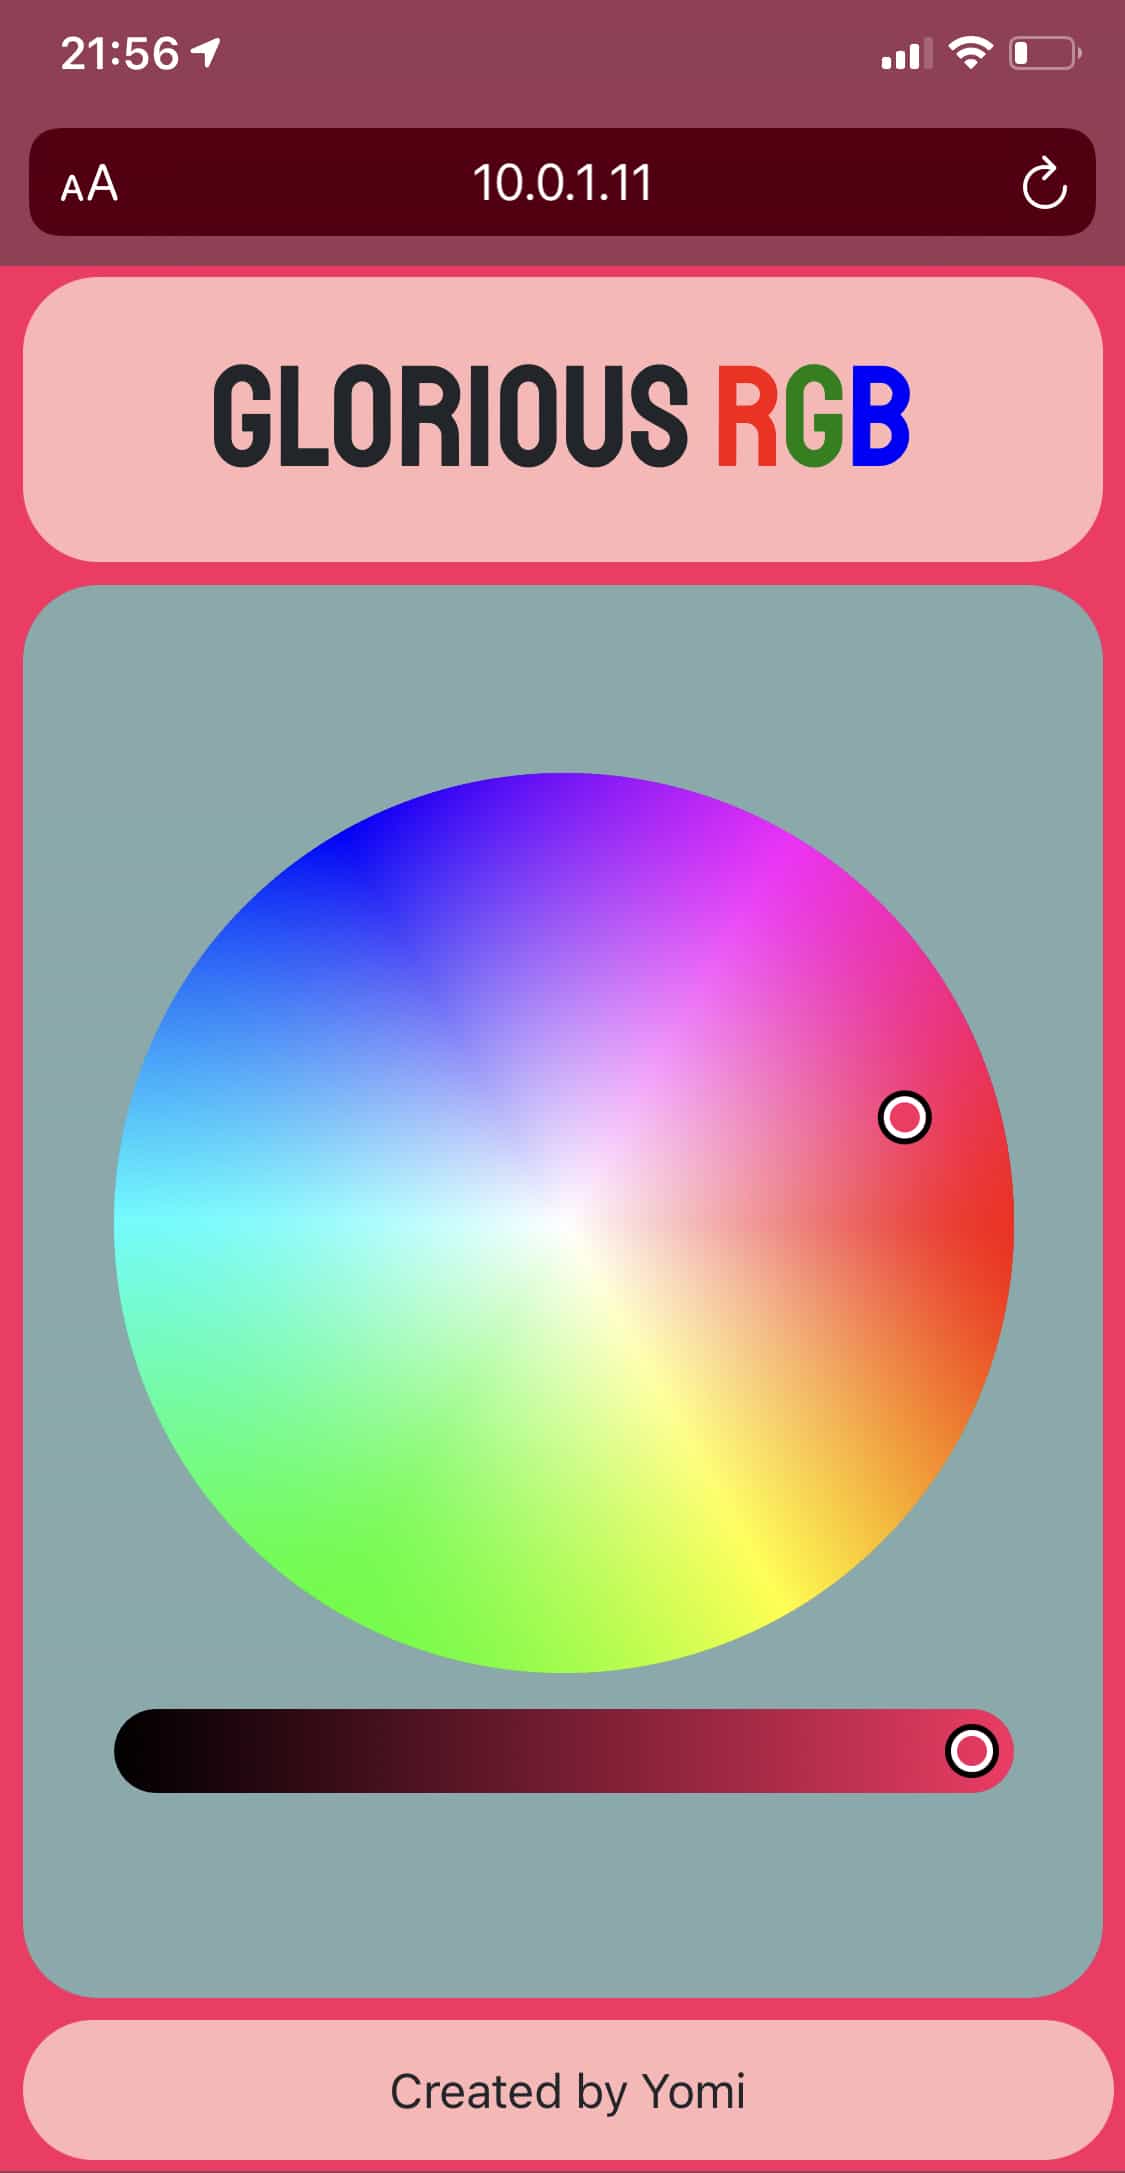
My most recent project making use of PiServer called glorious-rgb, is a web server built using Python and Flask that I use to control an LED light strip in my room.
There are future plans to link PiServer to Apple’s HomeKit and Amazon Alexa to perform the function of a hub for smart home accessories, or in my case, dorm accessories.
PiServer is connected by gigabit ethernet and delivers acceptable speeds that nearly saturate the gigabit link (The HDD and now SSD are connected to the Raspberry Pi via USB 3). This has proven adequate for playing Steam games such as Rocket League & GTA V over my local network which is facilitated by a 6th Gen AirPort Extreme.
To Summarise:
PiServer has been a successful project that has been able to execute a lot of orders excluding order 66...yet. It acts as a NAS, a media server, a backup server, a games library and most importantly, a learning tool to develop my skills in different software and networking applications.
Some details about PiServer were initially uploaded to the r/homelab Subreddit and was well received. PiServer .STL files are available to buy and download for a fee of £5 (GBP) via the link below.
You may also buy the CAD files if you'd like to modify PiServer for £15 (GBP).
Thank you for reading, and the answer is yes, I would love to have a chat with you.